Monday, January 30, 2012

The Body Shop Haul

So I've been sticking to my nail polish no buy for a whole few days! Actually I think it's been a week. Go me! However, that's still left me open to buying other things. Among these things was the irresistible LivingSocial coupon that was only $10 for $20 worth of The Body Shop products.

From my post from a few weeks back, I talked about buying the sampler of three of their hand creams. I was very impressed with them and unfortunately, for a girl like me, those sampler tubes don't last very long. The coupon was definitely justified. So after printing my coupon, I went over to The Body Shop on my lunch break. Here's what I picked up!


In addition to my LivingSocial coupon, the full side hand creams were 2 for $20, instead of their usual $18.50 each. The sales guy also talked me into signing up for the Love Your Body Club, which is The Body Shop's rewards card. It's $10 for a year long membership and you get 10% off your purchases and a gift on your birthday. So I got 10% off my purchase and I got my free gift since my birthday was in early January! 

Considering these great deals, I got their Hemp Hand Protector, Wild Rose Hand Cream, Japanese Cherry Blossom hand and nail cream, and the Almond nail and cuticle oil all for a total of $23.52! On the bottom of my receipt it says  saved a total of $39.40! That's nothing short of amazing in my book. 

Since The Body Shop hand creams are now my favorite, I'm sure I'll be using my membership throughout the year, so it was worth signing up for. The Japanese Cherry Blossom hand cream also smells amazing. I haven't used the Almond cuticle oil yet, but I'm sure it will come in handy.

Did anyone else get the LivingSocial deal? What are your favorite products from The Body Shop? I'd love to hear if you're a fan!

Sunday, January 29, 2012

My Namesake: Zoya Kelly

Hello readers! Pardon my absence from blogging the last few days. There has been a lot going on, some good, some bad. And on top of all of that, my body decided to get a cold that started late Friday night and I've spent most of today either watching Gossip Girl on Netflix or sleeping. Blah. Despite that, now I'm back with a post!

Last week, my Zoya promo package finally arrived! I had been waiting not so patiently for it to arrive, including checking the FedEx tracking whenever I could. But now both of my first ever Zoya polishes are in my hands. For the 2 free promo, I picked Kelly and Yara. Kelly was the obvious choice because it's my name. Then I picked Yara because I don't have many greens at all and it just looked like a gorgeous color.

The pretty box that Kelly and Yara came in.

Zoya also added a color tray with their Feel, True, and Fleck Effect collections.


Left to Right: Kelly and Yara


I was impressed that Zoya added the color trays for free. It will give me a better idea of what colors I want to order next. I have my eye on some of the Fleck Effect colors along with the True collection.

I decided to try Kelly first, since how could I got wrong with something named after me? (Ok, not named after me specifically, but you get the idea.) Kelly is a dark purple creme with a hint of gray. The bottle of Kelly has a very very subtle hint of shimmer, but it doesn't show up on the nail.

See the shimmer? 
I think the color is gorgeous, but I'm also partial to blues and purples. This being the first time I've used a Zoya polish, I found the formula needed a delicate hand. The brush seemed like it wasn't picking up enough enamel, but once it was on the nail it seemed like too much. Overall though I was able to reach complete opacity in two coats and used both a base coat and top coat. 


I love this color as an alternative neutral and I think Kelly is a good reflection of my own personality. It will also make a great canvas for some nail art that I will hopefully accomplish this week! 

What do you think of Kelly? Did you participate in the Zoya promo? What are your favorite Zoya shades? Let me know in the comments section!

Wednesday, January 25, 2012

Lorelei's (Blue) Tiara

I doubt anyone has been keeping track, but I'm up to untrieds #8 and 9. Although I can't say that's great progress because my resolution completely went out the window and I've purchased even more nail polish lately. Sales are my weakness and that's what's gotten me. But I am resolving to do a no buy right now. Let's just see how long that lasts.

For this manicure I decided to do some layering. My base color was two coats of China Glaze Blue Year's Eve from my Christmas haul. Blue Year's Eve is a shimmery royal blue that I would classify as a jelly from the Let It Snow collection. I was really excited about this polish because I love the color blue, but ended up being a bit disappointed with the formula. In all fairness, Time Traveler was a tough act to follow. I found Blue Year's Eve to be a bit watery and definitely needs 2-3 coats if you want to wear it alone. Luckily I was covering up my two coats.

Next I layered one coat of China Glaze Lorelei's Tiara over Blue Year's Eve. Lorelei's Tiara is a glitter polish made up of small silver and light blue hexagon glitters from the Eye Candy collection. I also got this one for Christmas and I love the combination. I also can't help that it reminds me Lorelai from my favorite show, Gilmore Girls, so it automatically has an edge over other polishes. I thought I would need 2 coats of LT, but there is sooo much glitter in there. I'm pretty sure that Lorelei's Tiara could be opaque on it's own without any layering. 

I couldn't just stop there. On my ring fingers as an accent, I added one coat of OPI DS Coronation. The difference of my ring fingers to the rest of my nails is very subtle and didn't work as well as I would have liked. 

I'm not going to include DS Coronation as an untried just yet, because I think I need to give it it's own post. I finished off everything with a coat of Seche Vite and the glitter has smoothed out nicely. 

Layering with Blue Year's Eve


Layering with Lorelei's Tiara


I still can't help staring at this combo. It's glitter packed, but also has a wintry feel to it. Perfect for this time of year. Despite my minor troubles with Blue Year's Eve, I'm still a fan of these two China Glaze polishes. 

 
What do you think about this layering combination? Do you own both of these polishes too? Let me know in the comments section!

Tuesday, January 24, 2012

You Know You're Addicted to Nail Polish When...

Today's post is short and sweet. There's always those lists of you know you're ____ when ... So I wanted to do one for all the lacquer heads out there. I know there are probably other lists like this out there, but this is my own. I kept it to ten, because I love a nice even number.  
  1. You can't go into your local drug store(s) without at least looking in the cosmetic aisle.
  2. The word swatch doesn't apply to just fabric anymore.  
  3. You're more worried about visible nail line than visible panty line.
  4. No matter how many times you've tried to explain, your boyfriend/husband/significant other just doesn't understand your love of polish.
  5. Nail polish and nail art tools have found their way onto your Christmas list.
  6. One word: Lynnderella. 
  7. You need a spreadsheet to keep track of all the polish you own (and your wish list).
  8. Your Helmer/Melmer/other storage unit, just isn't enough. There's never enough storage.
  9. You change your manicure more than once a week and sometimes more than once a day. 
  10. You have a blog dedicated to nail polish!
I hope you enjoyed my list! What are some of your "You Know You're Addicted to Nail Polish when..." sayings? 

Monday, January 23, 2012

Fail'd It, My First Stamping Attempt

For Christmas my hubby got me Bundle Monster plates along with the Konad accessories that I needed for stamping. This weekend I finally got around to trying it out.

For my base color I used Cult Nails Time Traveler. I had ordered it during the Cult Nails anniversary promo that offered free shipping. It came in the mail last week and it was so gorgeous in the bottle that I just couldn't wait to use it. Time Traveler is a dark royal, almost navy blue creme polish. The formula was great and I ended up using only one coat for the base. ONE COAT! It's an amazing color and I was kind of sad that I was going to stamp over it.

Cult Nails Time Traveler. Isn't it so pretty? 

I wanted to use a full nail pattern, but it didn't work out too well so I ended up trying two smaller designs from BM 223. On my left hand I stamped the bell from the plate using Mary Kay Gold Leaf. On my right hand I tried a another design with Maybelline Express Finish in Brassy that looked like a tattoo design. I don't have pictures of my right hand because despite my attempts, I just could not get a good photo.


I guess for a first stamping attempt it isn't too bad. But I've seen so many flawless examples of stamping that it's hard to think this was good. I'll just have to keep practicing and working on it. Next time I'll try some of those Sally Hansen Color Quick pens that I picked up from Big Lots for stamping instead. Until next time!

What was your experience with your first attempt at stamping? Do you have any stamping tips or advice? Which are your favorite plates: Bundle Monster, Konad or Red Angel? Let me know in the comments section!

Saturday, January 21, 2012

Big Lots Haul!

After Friday night date-night, I had the hubby stop at Big Lots so I could see if they had glass jars I could use for making nail polish once my materials come in. And let's be honest, in the hopes of finding some good polish deals.

Lo and behold, I was right. Hidden in a bowl with other nail polishes were two bottles of Revlon Carbonite! Some claim it's a close enough dupe of Chanel Graphite especially considering price. I don't own any Chanel nail polishes, but I figured Revlon Carbonite is a good find anyway, especially for $1.50 a bottle. I love a good sale.

I also picked up Wet n Wild Black Creme and two Sally Hansen Color Quick nail color pens, one in Silver Chrome and one in Red Chrome. They had a whole two boxes worth of the nail color pens, but I limited myself to two. I'm planning on using these with my Bundle Monster stamping plates (I'll discuss my first attempt in the next week.) The pens were also $1.50 each and the Wet n Wild was $1.00. It was a great find, even if they're not new products, and I just had to share it. So check out your local Big Lots,  you may luck out!


Where's your favorite place to find discounted nail polish? Do you own Revlon Carbonite? Tell me about it in the comments section!

Friday, January 20, 2012

Lefty Problems

Being new to the world of nail polish blogs, I've been trying to figure out the best pose for my hands in my swatch pictures. In many nail polish blogs there seems to be a signature pose and every picture is consistent with that pose or array of specific poses, lighting, etc. As you can probably tell, I don't have a signature pose. My method is to take a lot of pictures, then sort through and pick the best ones. (Again: I'm a n00b, so don't mind me.)

I've decided that most of my consistency issues come down to one factor: I'm a lefty. I'd like to think that being a lefty my entire life, I've adjusted well to a right-handed world. I throw, spike and serve in volleyball, and use scissors with my right hand, but I write, golf and bat lefty. It's some weird combination of being ambidexterous that I've compiled.

So with nail blogging, taking pictures is difficult for me. My left hand is obviously the better hand for painting my nails, so my right hand always has the better manicure. However, given that the majority of cameras have their buttons on the right side, taking pictures of my right hand is awkward and I end up featuring my left hand like a lot of bloggers. It's just easier for me physically to take pictures of my left hand. But then I get sad when my right hand obviously looks better and I end up struggling with my camera when I'm trying to get those pictures.

All in all, I'm still figuring out the best way to capture beautiful polishes and balancing being a lefty with the camera situation. I'd love to be more consistent with my poses, but switching hands makes it difficult. Maybe I just need to purchase a left handed camera, which also might feel strange since I've never used one before. Ah, the trials and tribulations of nail blogging as a lefty or just #leftyproblems.

Are there any other lefty nail bloggers out there? How do you take your pictures? Do you own a left handed camera or do you use the traditional right handed camera? I'd love to know your thoughts, comments and advice!

Thursday, January 19, 2012

Swatches: Rolling in the Deep and Rumor Has It

Today I have more swatches for you of the remaining two polishes in my Adele Collection! For all swatches below I used two coats of polish with one coat of Seche Vite.


Rumor Has It is a shimmery golden green. All of the colors in this trio seem to be hard to capture in photos.


The picture above is the most color accurate to what it looks like in person.


My cat Ripley also wanted to get in on the action.


Above is Rumor Has It in natural light. I don't normally get to use natural light in my pictures, since by the time I get home on weekdays it's already dark out. Lucky for me, I had Monday off and it was sunny out (despite the below 30 degree temperatures.) 


This last picture is with flash, to show off the shimmer in the nail polish. I don't usually like green nail polish, but I'm a fan of this color. (And not just because it's my own.) 

Next is Rolling in the Deep, which is a dusty purple with a hint of grey. 


The last picture is Rolling in the Deep in natural light as well. I've place an order for supplies and hopefully within the next few months I'll have a shop up and running!

Again, I hope you enjoyed these swatches of the Adele Collection. Let me know what you think in the comments section. I'd love to get some feedback!

Tuesday, January 17, 2012

Comparison: Essie Shine of the Times vs. Sally Hansen Glass Slipper (featuring Urban Outfitters Winter Berry)

A while ago I picked up Sally Hansen Glass Slipper from their revamped Diamond Strength collection. I hadn't used it yet, but when I (finally) picked up Essie Shine of the Times the other day, I decided it would be good to do a comparison post.

For my base coat I used another untried, Winter Berry from Urban Outfitters. I found Winter Berry as I was finishing up some Christmas shopping last month. Urban Outfitters actually surprised me with the amount of colors they have and an their interesting glitter polishes as well.


It looks gorgeous in the bottle. 


Also, here's my Christmas mani that I never made a post about. 


I didn't take any pictures of Winter Berry alone. I was a little disappointed with how Winter Berry looks when it's dry. It's a lot darker than I thought and even looks a bit black. I was hoping that it would have a little bit more shimmer, while still being a rich dark blue. However, the application and formula are impressive for the polish being from Urban Outfitters. I'm always a little hesitant when it comes to clothing store lines of polish, but I would be willing to try more Urban Outfitters polish in the future.

Next time I Winter Berry I'll wear it alone and post some swatches. I got ahead of myself because I was excited about my layering experiment!

After putting on 2 coats of Winter Berry and a top coat of Seche Vite, I decided to alternate nails between Glass Slipper and Shine of the Times. I started with Essie Shine of the Times and oh my gosh, I'm in love with this polish. It's from Essie's Luxeffects Top Coat collection and I've seen rave reviews, so I had to get my own bottle. As soon as you open the bottle, you can see the flake goodness and that gorgeous iridescence that shifts between yellow, green and orange. I believe I've heard some bloggers compare Shine of the Times to the way an oil slick looks in different light and as odd as it may sound, it's true.

Next I put on Sally Hansen Glass Slipper. Unfortunately, Glass Slipper is a lot less exciting right after using Shine of the Times. Glass Slipper is pretty much a straight forward white flake polish. It is a little iridescent, but you really have to look close to find it, especially since Shine of the Times is so in your face.

I tried layering two coats of each, but you really need only one coat for both polishes if you're layering. Here are my results (the pictures include one coat.)


My index and ring fingers are Winter Berry with Essie Shine of the Times over it and my middle and pinkie have Winter Berry with Sally Hansen Glass Slipper.


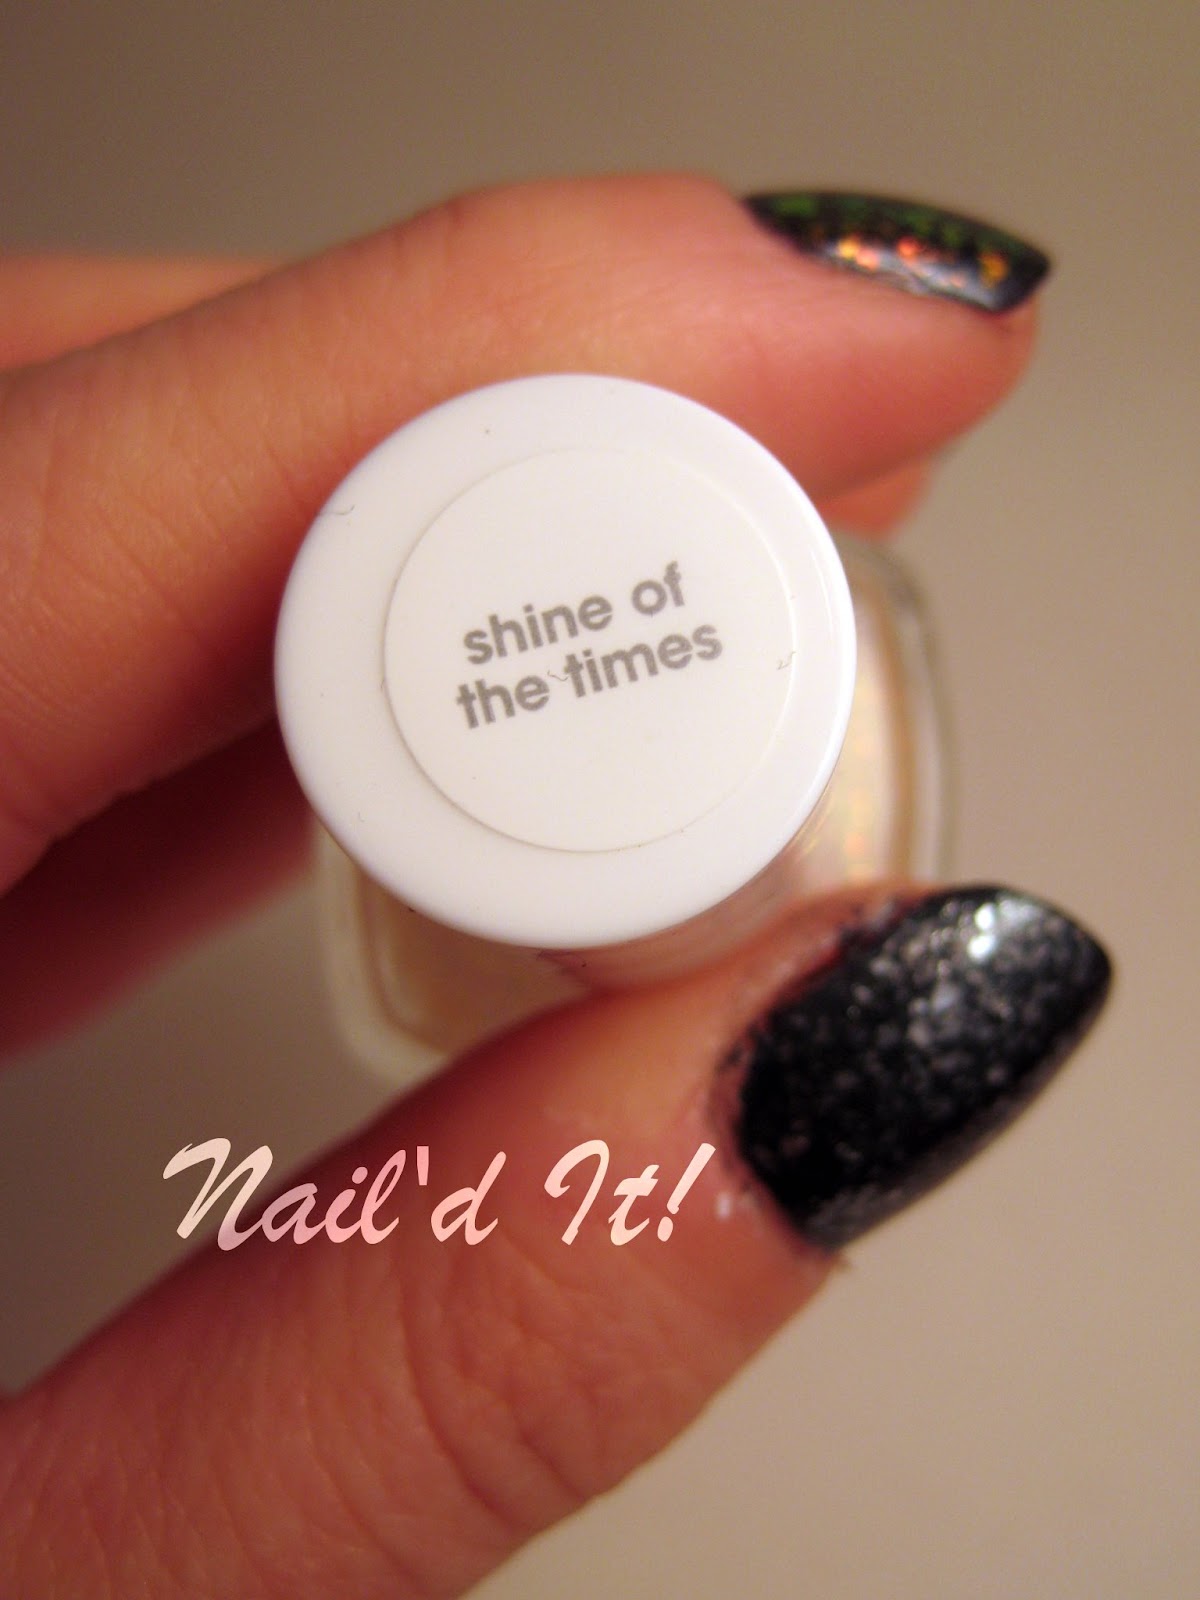
Shine of the Times in the bottle. You can just see the amazingness!


Here is each finger labeled. SOTT = Shine of the Times and GS = Glass Slipper.

Between these two flakes, there really is no comparison other than that they are flakes. They are definitely not dupes and not similar at all. Glass Slipper is a nice subtle flake, while Shine of the Times has the wow effect. I would definitely use both again though. I love that you only need one coat to get good coverage and I can't wait to try out other layering combinations with these!

What are your thoughts on Shine of the Times and Glass Slipper? Do you own both? Are flakes your new favorite trend? Leave your thoughts in the comments section! 

Monday, January 16, 2012

Franken Swatch: Set Fire to the Rain

This past week I dedicated a post to a trio of frankens / custom blended nail polish I created and titled the Adele Collection. While they weren't my first ever nail polishes that I made, they are the first that I'm truly proud of and confident enough to put on the blog. Plus, I had a lot of polish that just didn't work because of glitter bleeding so it was nice to finally have a solid result after all that tinkering with glitters and pigments.

In the former post I showed you the swatches from this trio on a color wheel and how they look in the bottles, but now I have one of the colors as an actual swatch! My Fiji Frenzy manicure started chipping within a few days of applying it (boo), so I just re-did my nails, this time with my custom blend I call Set Fire to the Rain.

For all the swatches below I used 2 coats with one coat of Seche Vite. The formula was a bit thick, so next time I'll add some thinner to the polish. I used the brush from the ManGlaze bottle, and while I love the bottles for frankens, they're not as great for applying polish. The handle of the brush is about the width of a quarter and only about 2 inches high, so it's a bit awkward and cumbersome to handle. The combination of the handle and the thickness of the polish worked against me, so the manicure was a little sloppy.


I'm still playing around with the mug idea. I love this panda mug. 


Set Fire to the Rain is a bit coral with a golden shimmer that also looks a little light orange at times. After a few days of wearing it, it definitely grew on me. The color lasted about 5 days before any major chipping began, but I did have some tip wear within about 3 days.


The photos above and below are how Set Fire to the Rain looks with flash. I wanted to show off how multi-dimensional the color is. It looks different in all types of light. All of the colors I used to create the nail polish come through and create a gorgeous combination. 


I hope you enjoyed my first swatches of this collection! I've enjoyed creating these custom blends as a creative outlet and I'm happy to share them with you.

Let me know your thoughts on this color in the comments section! Any advice or personal tales on making frankens / custom blends? 

Sunday, January 15, 2012

Touchdown: The NFL Nail'd It!

As some of you may or may not know, we are in the midst of the NFL playoff season. The Giants just beat the Packers and will now advance to face the 49ers in the playoffs. I myself am a New Yorker and very excited about this. My favorite team the Jets didn't make it to the playoffs, so it's nice to have at least one New York team do well.

"But what does football have to do with nail polish?", you may ask. I would have said nothing up until today, when I saw a post from Prim and Polished  about the San Francisco 49ers nail polish. At first I thought they were frankens, but it turns out that the NFL actually sells nail polish. How cool! Usually sports organizations catering to women is limited to pink jerseys and shirts and tight fitting clothing. It's nice to see the NFL branching out.You can check out Prim and Polished at the link above for her swatches of the 49ers duo. (And let Gina know that the Giants are going to win next weekend, haha.)

In honor of the Giants' win tonight, here is the link for the KE Specialties New York Giants Breast Cancer Nail Polish. The sets are $17.99 in the NFL shop online and come with two bottles, one bottle is based off of a team with the team's logo on the bottle and the other is a bottle of pink nail polish.  There are also a few sets that are duos of select NFL teams colors.

What do you think about the NFL having a nail polish line? Are you a football fan? I'd love to hear your thoughts on this in the comments section!

Tuesday, January 10, 2012

Untrieds #2 and 3: A Fiji Frenzy from Sinful Colors

I ended up wearing For Audrey for a full week because I loved it so much. Plus, there was hardly any tip wear and virtually no chipping. China Glaze is quickly becoming a favorite.

However, this is not a China Glaze post. I still have a bunch of untrieds to get through, so this week is a two-for-one mani. You may remember from my Christmas haul post that I got both Fiji and Frenzy from Sinful Colors. From the moment I saw them together, I knew they'd be a great layering combo.

I started off with a Seche Clear base coat, then two coats of Sinful Colors Fiji, which is a bright purple. I wasn't too thrilled with the coverage of two coats and the formula is a little watery. My ideal polishes are opaque in 2 coats, but Fiji would probably need 3 if worn alone. I left it at two coats though since it was a base for layering. Fiji is a pretty purple, but it didn't blow me away. Overall, it's a good color to have for layering.

On top of Fiji, I used one coat of Seche Vite Fast Dry Top Coat and then I applied two layers of Sinful Colors Frenzy. Frenzy is purple and light blue glitter in a clear base. After two coats, it really does look like a glitter frenzy! I finished off the mani with two coats of Sally Hansen No Chip Top Coat to smooth it all out.


As you can see, I tried something new and thought it might be a good idea to take my photos while holding a coffee cup. It didn't work as well as I would have liked. Holding a coffee cup in your hand, inside a light box while trying to take photos of your own manicure is awkward! 


It's hard to capture how sparkly this combo of Fiji and Frenzy really is. But I love it in person!


Overall I like this layering combo a lot. The purples in the two polishes compliment each other well and the light blue glitter adds that extra pop of color. This combo keeps catching my eye throughout the day and sometimes the combination even looks fuchsia out of the corner of my eye. I'm looking forward to using Frenzy for other layering combos in the future!

What do you think about this layering combo? What is your favorite shade from Sinful Colors? Do you like my (coffee) mug shot? 

Monday, January 9, 2012

Breaking (Bad) Resolutions and Treat Yo Hands with products from The Body Shop.

So it's not even two weeks into January and I've already broken my nail polish resolution. There have been some incredible sales and promotions recently. a-england's anniversary 30% sale, the Zoya get 2 free promotion, and Cult Nails free shipping for their one year anniversary/birthday.

After deciding that a-england would be a major splurge (the pounds to US dollar conversion is not good for the wallet), I decided to go with the Zoya 2 Free promotion instead. A total cost of $6.95 for 2 polishes and shipping is a GREAT deal, so I couldn't pass it up. Zoya Kelly and Zoya Yara will be the two new additions to my collection and my first Zoya polishes ever. I can't wait until they arrive!

I also took part in the Cult Nails free shipping promotion. I decided to purchase Time Traveler since the swatches I've seen from other blogs are gorgeous. Time Traveler will be my first Cult Nails purchase as well. I love trying new brands!

I'm considering these part of my birthday present, since my birthday was last week (January 5th, yay me!) and I've gotten some birthday cash from my family. With "treat yo self" being the motto for my birthday (courtesy of Parks & Recreation), I went in search of a great body butter for my hands. I was going to stop by Bath & Body Works, but after 60 seconds in the door I realized it was way too crowded for me. It was during my lunch break so I didn't have time to wait on a long New York City line.

So I went across the street (gotta love the city) to The Body Shop, which was also having a sale and had no line. I didn't end up finding a butter (I'll just get Lush Lemony Flutter), but I did purchase a three pack of The Body Shop hand & nail creams and some lip balm. The three pack included 3, 1 ounce tubes of hand & nail cream, which normally retails for $25 (ouch!), but was on sale for $12.50 (way more my style).

From left to right: Almond  Hand & Nail Cream (for all skin types), Hemp Hand Protector (very dry skin), and  Wild Rose Hand Cream (mature skin).


The Almond Hand & Nail Cream is a good everyday moisturizer. It smells good too, nice and subtle, not overpowering. All of these hand creams take a little time to absorb.


The sales person at The Body Shop told me that the Hemp Hand Protector was named the top beauty product of the year in the industry. I don't know the exact publication/website/blog, but I figured I would give it a try. I am not a fan of the smell of the Hemp cream, but you can instantly feel the softness on your skin after using it. I think I'll end up leaving the Hemp Hand Protector at home and using it before bed. 


The Wild Rose Hand Cream is probably my favorite of the three based on smell, but I like the smell of roses to begin with. The smell is a bit strong though, probably because of the rosehip oil. So if you're sensitive to smells and don't like floral scents, this probably isn't the hand cream for you. 

Overall, I'm a fan of all three of these. I keep reaching for them whenever my hands feel dry and I keep at least one in my purse. Between the cold winter weather and all the acetone I use, having a good hand cream is key. The Body Shop also won me over as a new favorite store. After buying these products, I went onto The Body Shop website to look at their products again, where I found out that they don't test on animals and use a lot of Fair Trade, natural products. These things are a big plus to me right now as a consumer and it's great to find brands like this. I will be shopping there more often from now on!

Are you a fan of The Body Shop? What are some of your favorite hand creams or butters? Share your thoughts in the comments section!